
Quick Answer: To find underground water pipe leaks without digging, start by turning off all fixtures and appliances, then do a water meter test to confirm continuous water flow. Next, check for low water pressure using a pressure gauge, inspect the yard for wet spots, standing water, or unusually lush / greener grass patches, and listen for unusual sounds (hissing, bubbling, gurgling, trickling) near the water meter and supply line. If multiple signs point to a leak, use no-dig tools like acoustic leak detection, infrared camera, tracer gas detection (hydrogen + nitrogen mix), ground penetrating radar (GPR), and CCTV inspection to pinpoint it without excavation.
Understanding Underground Water Pipe Leaks (Without Digging)
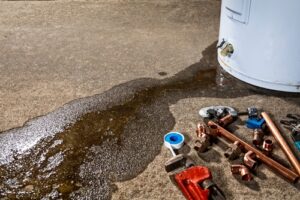
The hardest part about an underground plumbing leak is that it may hide for weeks while wasting water and damaging property. In many homes, the first warning is unexplained high water bills or a sudden spike in water usage that doesn’t match your routine.
When people ask how to find underground water pipe leaks, the real goal is twofold:
- Confirm whether you have a leak (not just higher usage), and
- Narrow where it is (yard line, irrigation, toilet, or inside plumbing).
Tip: Don’t rely on one clue alone. A single symptom can be caused by something else, but several matching indicators almost always point to a real leak.
Early Signs You Have a Leak Underground
The clearest signs of underground water leak are billing changes, pressure changes, yard moisture anomalies, and structural symptoms that appear without obvious cause.
Here’s what to watch for before you dig anything up:
- Unexplained high water bills or a sudden spike in water usage
- Water usage patterns showing odd increases or constant usage
- Low water pressure or a noticeable pressure drop at multiple fixtures
- Wet spots / soggy yard, standing water / pooling water, and spongy lawn
- Unusually lush / greener grass patches in one specific area
- Sinkholes / sunken areas or subtle ground settling
- Cracks in pavement / driveway cracking and other hardscape movement
- Foundation settling with foundation cracks / exterior wall cracks
- Unusual sounds (hissing, bubbling, gurgling, trickling) when nothing is running
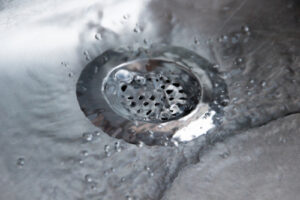
- Dirty / discolored water suggesting intrusion of soil or debris
These symptoms often appear because water escaping underground causes soil erosion, which can lead to landscape damage, settling, and cracking.
Step 1 - Confirm the Leak With a Water Meter Test
The water meter test is the most reliable DIY method for how to find underground water pipe leaks because it detects hidden flow when everything is off.
How to Do the Water Meter Test
- Turn off all fixtures and turn off appliances (ice makers, irrigation, appliances).
- Locate the meter and take a meter reading (recording/taking a photo).
- Ensure turning off all fixtures again double check toilets aren’t refilling.
- Wait a fixed window: 15 minutes / 30-60 minutes (longer catches small leaks).
- Recheck the meter. Any movement = continuous water flow.
How to Read Your Meter Correctly
- An analog meter spinning dial (often a small triangle/star dial) moving during the test means water is flowing.
- A digital meter usage reading changing, even slightly, also indicates flow.
Quick Fix: If the meter moves, do a fast toilet check next: a toilet can mimic an underground leak. Use the food coloring test to confirm a toilet tank leak caused by flapper / seal failure.
Step 2 - Isolate the Source With Simple Shutoff Testing
Isolation testing (irrigation shutoff / appliance shutoff) helps you figure out whether the leak is outside, inside, or tied to one system.
After your meter test confirms flow, repeat it with targeted shutoffs:
- Shut off irrigation separately and re-test.
- Shut off the home’s main interior supply (if you have a valve inside) and re-test.
- If possible, isolate appliances one at a time (or ensure they’re fully off).
This approach turns leak confirmed into leak narrowed, which is the smartest next step in finding water leaks underground without guessing.
Step 3 - Test Water Pressure to Gauge Leak Severity
A whole-home pressure check can reveal if a leak is significant especially if your pressure drops below normal.
Pressure Test Setup
- Attach a pressure gauge to an outdoor faucet closest to the main supply.
- Make sure all taps are off and no appliances are running.
- Read the gauge; normal is 40-60 PSI for many homes.
- Watch for a sustained pressure drop.
If you’re consistently below range, that could be a main-line leak or other system issue. Pressure clues matter because a major leak can reduce pressure while driving up your water bill.
If your leak is confirmed and pressure is unstable, it may be time to consider trenchless pipe repair as a future solution path especially when the suspected leak is under hard scape and you want minimal disruption.
Step 4 - Inspect Your Yard and Hardscape for Leak Clues
Yard and surface clues help you locate underground water by showing where water is rising or where soil is washing out.
Walk your property slowly and look for:
- Wet spots / soggy yard that persist in dry weather
- Standing water / pooling water near the foundation, driveway edges, or low points
- Unusually lush / greener grass patches in one localized zone
- Spongy lawn that compresses underfoot
- Sinkholes / sunken areas that suggest subsurface washout
- New cracks in pavement / driveway cracking or shifted pavers
- Signs of foundation settling or foundation cracks / exterior wall cracks
All of these can be driven by a leak-caused loss of soil support. The physics is simple: escaping water can trigger soil erosion, which weakens support under slabs and walkways, leading to cracking and settlement.
Tip: Mark suspicious zones with small flags. You’ll use these markers during listening checks and any professional pinpointing.
Step 5 - Listen for Underground Leak Sounds (DIY Acoustic Check)
Listening can reveal the leak’s vicinity because pressurized water escaping creates consistent sound signatures.
The best time is when the environment is quiet (early morning or late evening). Stand near:
- The water meter box
- The path of your supply line (often a straight route toward the home)
- Exterior wall points where piping enters the structure
Listen for unusual sounds (hissing, bubbling, gurgling, trickling). Even subtle sounds can be meaningful if you’ve already confirmed meter movement.
DIY Stethoscope Trick
Place a screwdriver tip on a pipe or valve housing and press the handle gently to your ear. It’s not perfect, but it can amplify vibration and flow noise.
Why Underground Pipes Fail in the First Place
Underground leaks happen when materials weaken, joints separate, or the ground shifts and stresses the pipe.
Common underlying drivers include:
- Wear and tear over decades
- Faulty pipes and fittings or poor historical workmanship
- Ground movement and settling that stresses joints
- Pipe corrosion that thins metal walls
- Root intrusion / tree roots forcing into joints
- Mineral buildup / scale reducing flow and stressing weak points
- Cracks and fractures from pressure changes and soil stress
Accurate underground leak detection depends on proper interpretation of data from acoustic sensors, thermal imaging, and radar tools. Choosing the best plumbing company for diagnostics ensures these technologies are used correctly, reducing false readings and unnecessary repairs while protecting the surrounding structure.
Professional No-Dig Leak Location Methods (When DIY Isn’t Enough)
Pros locate leaks without excavation using sound, heat, gas, radar, and imaging often combining methods for accuracy.
Non-Invasive Leak Detection Tools
Method | What It Detects | Best For | Notes |
Acoustic leak detection (ultra-sensitive microphones) | Leak sound/vibration | Pressurized line leaks | Often the first pro step |
Thermal imaging / infrared camera | Temperature differences | Slab/wall areas | Great for hidden heat/moisture patterns |
Tracer gas detection (hydrogen + nitrogen mix) | Gas escaping through leak | Tiny leaks | Uses specialized sensors |
Ground penetrating radar (GPR) | Subsurface anomalies | Complex layouts | Helpful when pipes are deep |
CCTV / video camera inspection | Internal pipe view | Drain/sewer or accessible lines | Finds cracks, offsets, roots |
If your system is old and multiple weak points are found, trenchless pipeline rehabilitation can restore internal integrity without tearing up the property.
Smart Leak Detection and Real-Time Monitoring
Smart systems detect abnormal flow continuously, helping you catch leaks faster than waiting for the next bill.
If your meter test confirms flow but the source remains unclear, smart monitoring can highlight:
- When the leak began (time-of-day patterns)
- Whether usage is constant or intermittent
- Whether the leak worsens during irrigation cycles
These systems typically measure flow at the main, alerting you to “always-on” usage patterns that align with hidden leaks.
Tip: Even without a smart device, you can simulate this by checking your water usage patterns at consistent times daily for a week.
Common False Alarms That Mimic Underground Leaks
Some issues look like underground leaks but come from fixtures, irrigation, or internal plumbing.
Here are frequent look-alikes:
- A running toilet (confirm with food coloring test)
- Irrigation valve problems causing slow seepage
- Interior fixture drips adding up
- Seasonal watering changes that create a bill spike
Quick Elimination Checks
- Verify toilets aren’t refilling silently (toilet tank leak symptoms)
- Confirm irrigation is off during meter test
- Ensure no appliances cycle water (ice maker, softener, etc.)
- Check outdoor spigots for slow drips
What to Do Immediately After You Confirm a Leak
Once confirmed, reduce damage by limiting use, protecting structures, and preventing soil washout.
If the leak is severe (fast meter movement, pooling water, big pressure loss), take steps that limit escalation:
- Reduce non-essential water use
- Avoid saturating the suspected area (don’t water over it)
- Keep vehicles off soft areas to prevent collapse and worsening sinkholes / sunken areas
Damage-Control Actions
- Photograph yard changes and cracks for baseline tracking
- Mark wet zones and sound zones for later pinpointing
- Watch for dirty / discolored water that may indicate contamination risk
- Monitor for rapid foundation settling indicators
When internal deterioration is confirmed and property disruption matters, homeowners often consult reliable pipe lining experts to discuss lining feasibility versus replacement.
How to Prevent Future Underground Leaks
Prevention is about early detection, pressure stability, and reducing soil/roots stress on pipes.
Practical prevention steps:
- Check monthly for unusual billing shifts
- Do a short meter test every quarter
- Keep trees planted away from main lines to reduce root intrusion / tree roots
- Address pressure regulator issues quickly to reduce stress that causes cracks and fractures
- Flush systems where appropriate to limit mineral buildup / scale accumulation
Symptom → Most Likely Cause → Next Best Test
Symptom | Likely Cause | Next Best Test |
Bill spike + no lifestyle change | Hidden leak | Water meter test |
Pressure low everywhere | Major leak or supply issue | Pressure gauge check |
Wet patch + lush grass | Leak under yard | Yard inspection + listening |
Driveway cracks / settling | Soil erosion from leak | GPR or acoustic check |
Discolored water | Intrusion/pipe damage | Inspect + consider CCTV |
Get Professional Help Before Damage Spreads
Hidden water leaks can escalate quickly from wasted water to foundation damage and costly repairs. If you’ve confirmed a leak or are seeing multiple warning signs, professional inspection can save time, money, and stress.
Coast to Coast Plumbing provides expert underground leak detection using non-invasive methods designed to locate problems accurately without unnecessary digging. Early action helps protect your home, landscaping, and plumbing system.
📞 Call Coast to Coast Plumbing today: 3102755800
Get clarity, prevent damage, and restore peace of mind.
FAQs About How to Find Underground Water Pipe Leaks
Do a water meter test by turning off all fixtures, recording the meter, waiting 15 minutes / 30-60 minutes, and checking for movement. If it changes, you have continuous water flow and likely a leak.
Combine yard clues (wet spots, greener grass, pooling) with listening for hissing or trickling, then use no-dig methods like acoustic leak detection, thermal imaging, or tracer gas for precise location.
Yes, especially if your reading is below 40-60 PSI and multiple fixtures are affected. Verify with a meter test to confirm flow when nothing is running.
Use a food coloring test in the toilet tank. If dye enters the bowl without flushing, you have a toilet tank leak often caused by flapper / seal failure.
If multiple signs point to a leak but you can’t narrow the area or if there are cracks, pooling water, or major pressure drops use pros who can deploy GPR, specialized sensors, and CCTV / video camera inspection without excavation.